Original Steps Provided by the User (for reference):
- Go to the official conversion website:
https://imageconverte.com/ - Select “Choose File”.
- Select the image you want to convert.
- Under “Output format,” choose “WEBP.”
- Select “Convert.”
- The “Download Converted Image” button will appear at the bottom.
Introduction:
WebP is a modern image format developed by Google that offers superior lossy and lossless compression for web images, making it a critical tool for improving website speed and performance. Converting your traditional JPG or PNG images to WebP can drastically reduce file sizes without noticeable quality loss, directly contributing to better user experience and higher search rankings. This human-centric, step-by-step guide details a quick and effortless six-step process to utilize an online converter, ensuring your conversion is seamless and your content is fully optimized for Google’s indexing systems.
Why Choose WEBP? (A Quick SEO Note):
Google highly recommends using the WebP format. It consistently delivers smaller file sizes (up to 25-34% smaller than JPG and PNG), which significantly improves page load times. Since speed is a paramount ranking factor, using WebP directly contributes to improved Core Web Vitals and overall SEO performance.
6 Simple Steps to Convert Your Images to the WEBP Format Instantly
You do not need to install complex software to achieve this high-efficiency conversion. We’ll use a fast, browser-based platform to seamlessly transform your images into the modern WebP standard.
Step 1: Navigate to the WebP Conversion Tool
The first essential step is to access a reliable, dedicated online conversion service. Open your browser and go directly to a platform like https://imageconverte.com/ (or a similar, trusted high-speed image converter). This ensures you are on the correct, professional interface for the conversion.
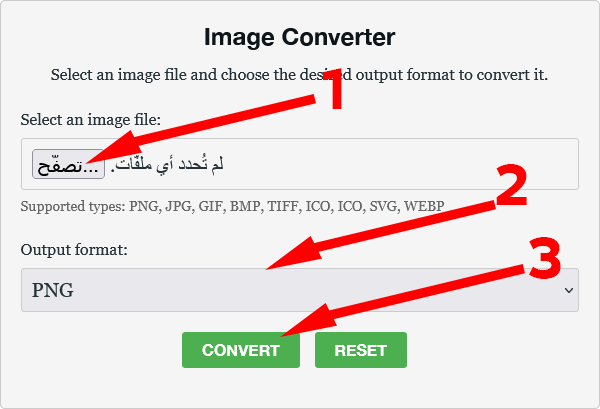
Step 2: Initiate the File Upload
On the tool’s main screen, locate and click the primary upload prompt, clearly labeled “Choose File.” This action will activate your system’s file explorer, allowing you to browse your local storage for the image you need to optimize.
Step 3: Select Your Source Image
Navigate through your files and select the specific picture or graphic (such as a large JPG or PNG) that you wish to convert into the efficient WebP format. The selected image will be quickly uploaded to the online workspace, ready for processing.
Step 4: Designate the Output Format (The Modern Standard)
This is the most critical setting. You must clearly instruct the tool on the desired final file type. Locate the settings area, commonly labeled “Output format” or “Target Format.” From the list of options, you must explicitly choose the WEBP format. This selection initiates the powerful compression process.
Step 5: Execute the Conversion Command
With the image uploaded and WebP correctly chosen as the target, proceed by clicking the main action button, usually marked “Convert.” The online engine will now rapidly process the image, applying Google’s advanced compression technology to generate the highly optimized WebP file.
Step 6: Download Your Optimized WEBP File
Upon successful completion of the conversion, the page will refresh or display a notification. Locate and click the final button, generally labeled “Download Converted Image.” Your new, small-sized, and web-ready WebP file will be saved directly to your device, ready for immediate deployment on your website.
Leave a Reply