Original Steps Provided by the User (for reference):
- Go to the official conversion website:
https://imageconverte.com/ - Select “Choose File”.
- Select the image you want to convert.
- Under “Output format,” choose “PNG.”
- Select “Convert.”
- The “Download Converted Image” button will appear at the bottom.
Introduction:
Converting images to the PNG format is a common necessity, whether you’re a web designer, a digital artist, or simply someone looking for a high-quality, transparent background for a logo or graphic. While complex photo editing software can do the job, the fastest and most accessible method is often a reliable online converter. This step-by-step guide will walk you through a simple, effective process to instantly change your image file type to PNG, ensuring a smooth and quick workflow.
Why PNG? (A Quick SEO Note):
The PNG (Portable Network Graphics) format is essential for web use because it supports transparency and is a lossless compression format, meaning the image quality is preserved perfectly. This makes it ideal for icons, logos, and graphics where clarity and a transparent background are key.
Simple 6-Step Method: Converting Your Image to PNG
Forget complicated menus and slow downloads. We’re going to use an efficient, dedicated online tool to get this done in less than a minute.
Step 1: Navigate to the Conversion Platform
The first and most critical step is to open the correct tool. Head directly to a trusted online converter like https://imageconverte.com/ (or a similar high-speed alternative). This will ensure you start the process on a professional, dedicated page designed for quick format changes.
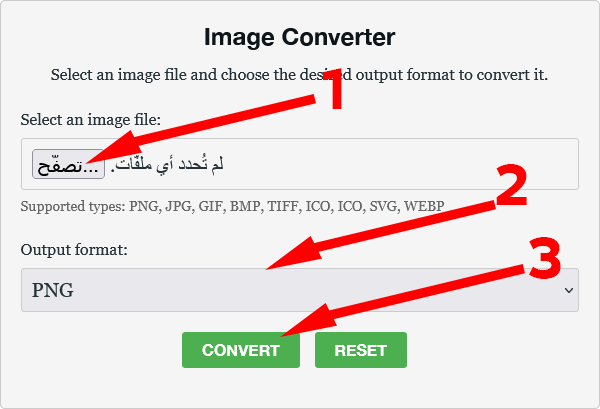
Step 2: Initiate the File Selection
Once the site loads, locate and click the prominent “Choose File” button. This action will open your computer’s file explorer or your phone’s photo library, allowing you to browse your saved files.
Step 3: Select Your Source Image
Carefully navigate through your folders and select the specific image (e.g., a JPG, GIF, or WEBP file) that you intend to transform into a PNG. After selecting the file, the conversion tool will automatically prepare it for the next step.
Step 4: Specify the Output Format (Crucial Step)
Look for the setting often labeled “Output format” or “Target Format.” From the dropdown menu or list of options, make sure to explicitly choose the PNG format. This tells the converter exactly what file type you want as the result.
Step 5: Execute the Conversion
With the image uploaded and PNG selected as the target, all that’s left is to start the process. Click the “Convert” button. The tool will then process your image file—this typically takes only a few seconds, depending on the file size and your internet speed.
Step 6: Download Your New PNG File
Upon successful completion, the page will refresh or display a notification. A new button will appear, usually labeled “Download Converted Image.” Click this button to save the newly created, high-quality PNG file directly to your device.
Leave a Reply